Customers
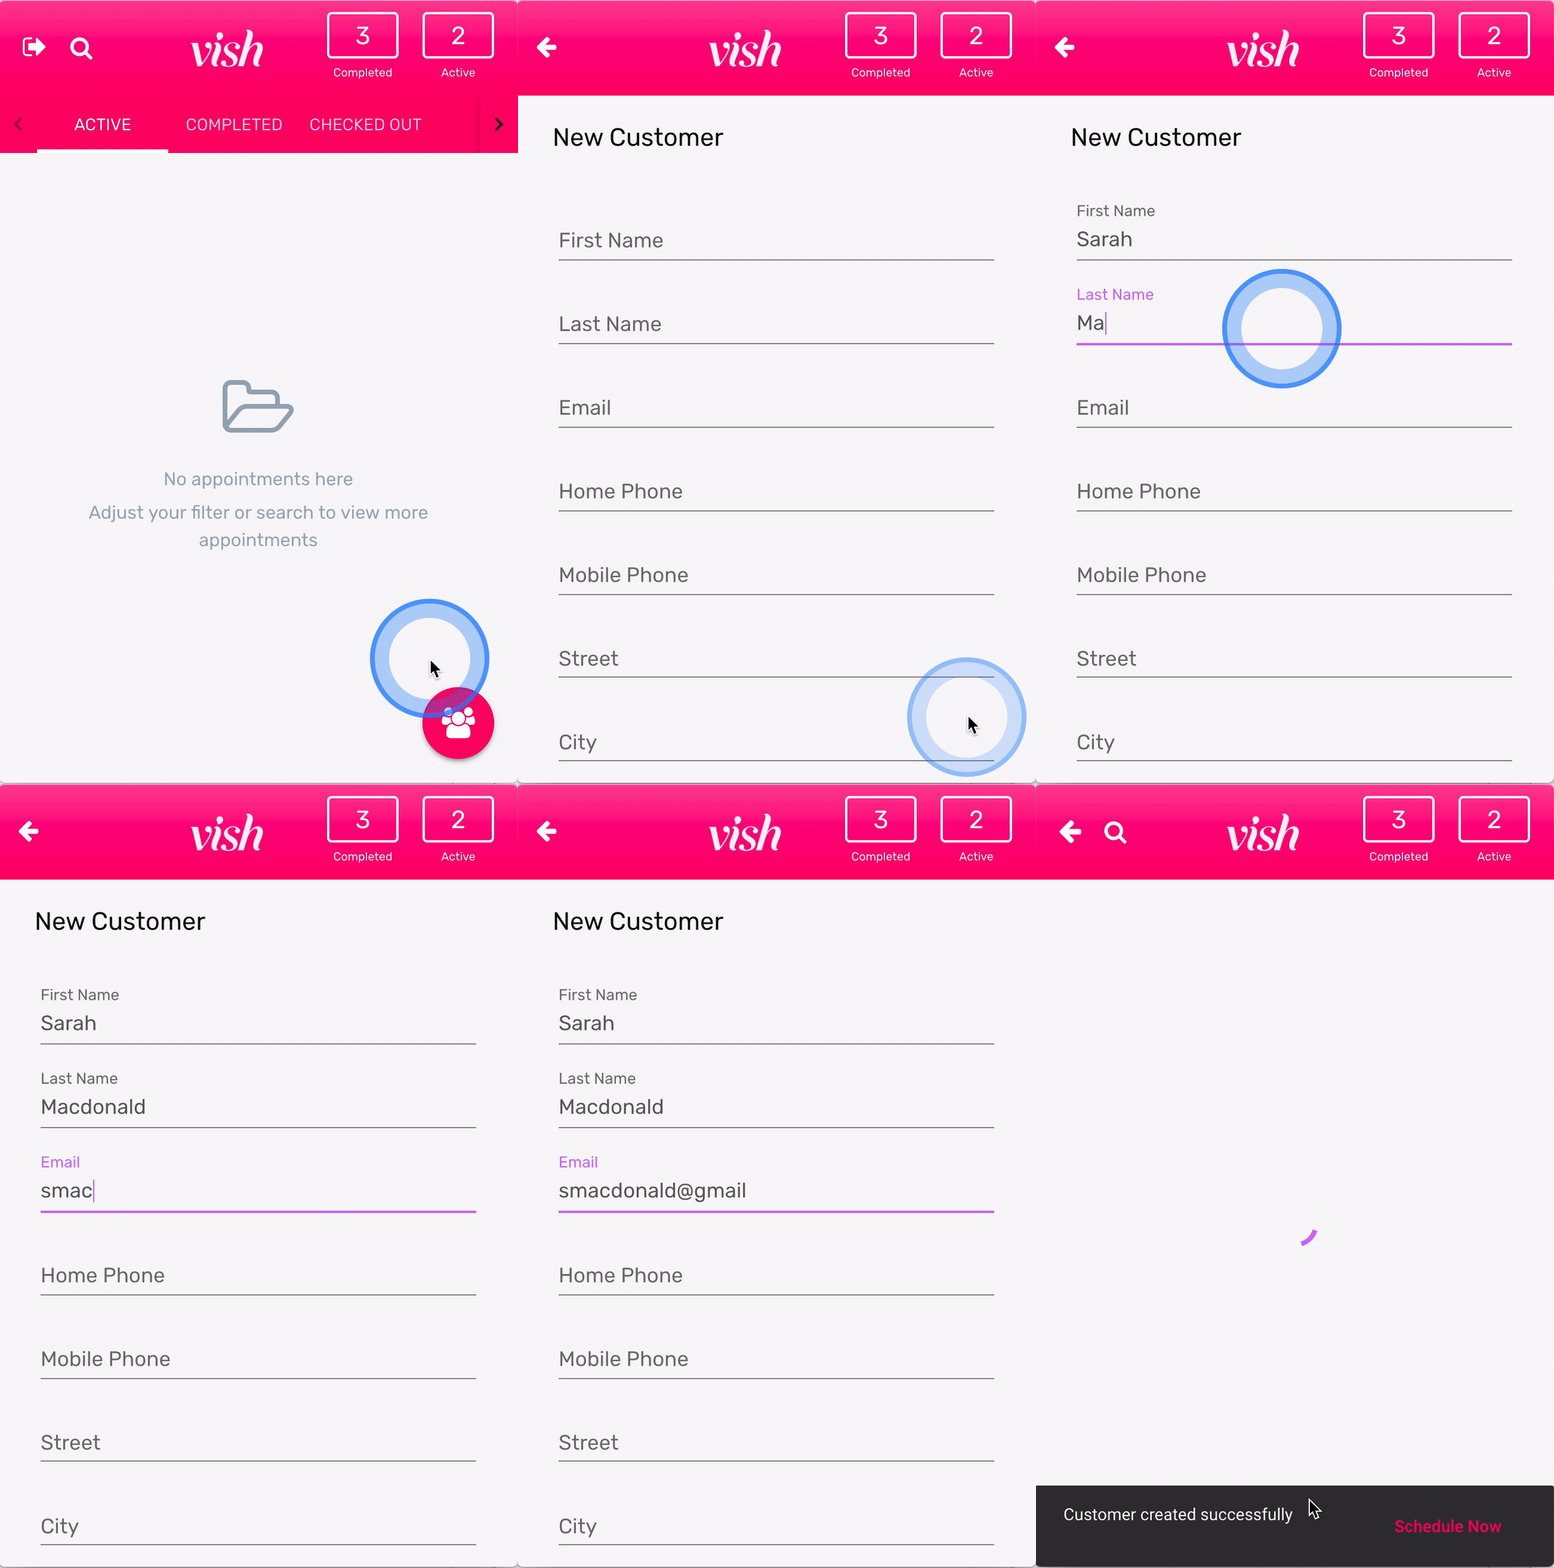
Creating a Customer
From the customers list, tap the Plus button.
Enter the customer's information and tap Save.
Note: first name and last name are required, however we recommend entering all of the available customer information. Ensure that you have these fields entered before you tap save.

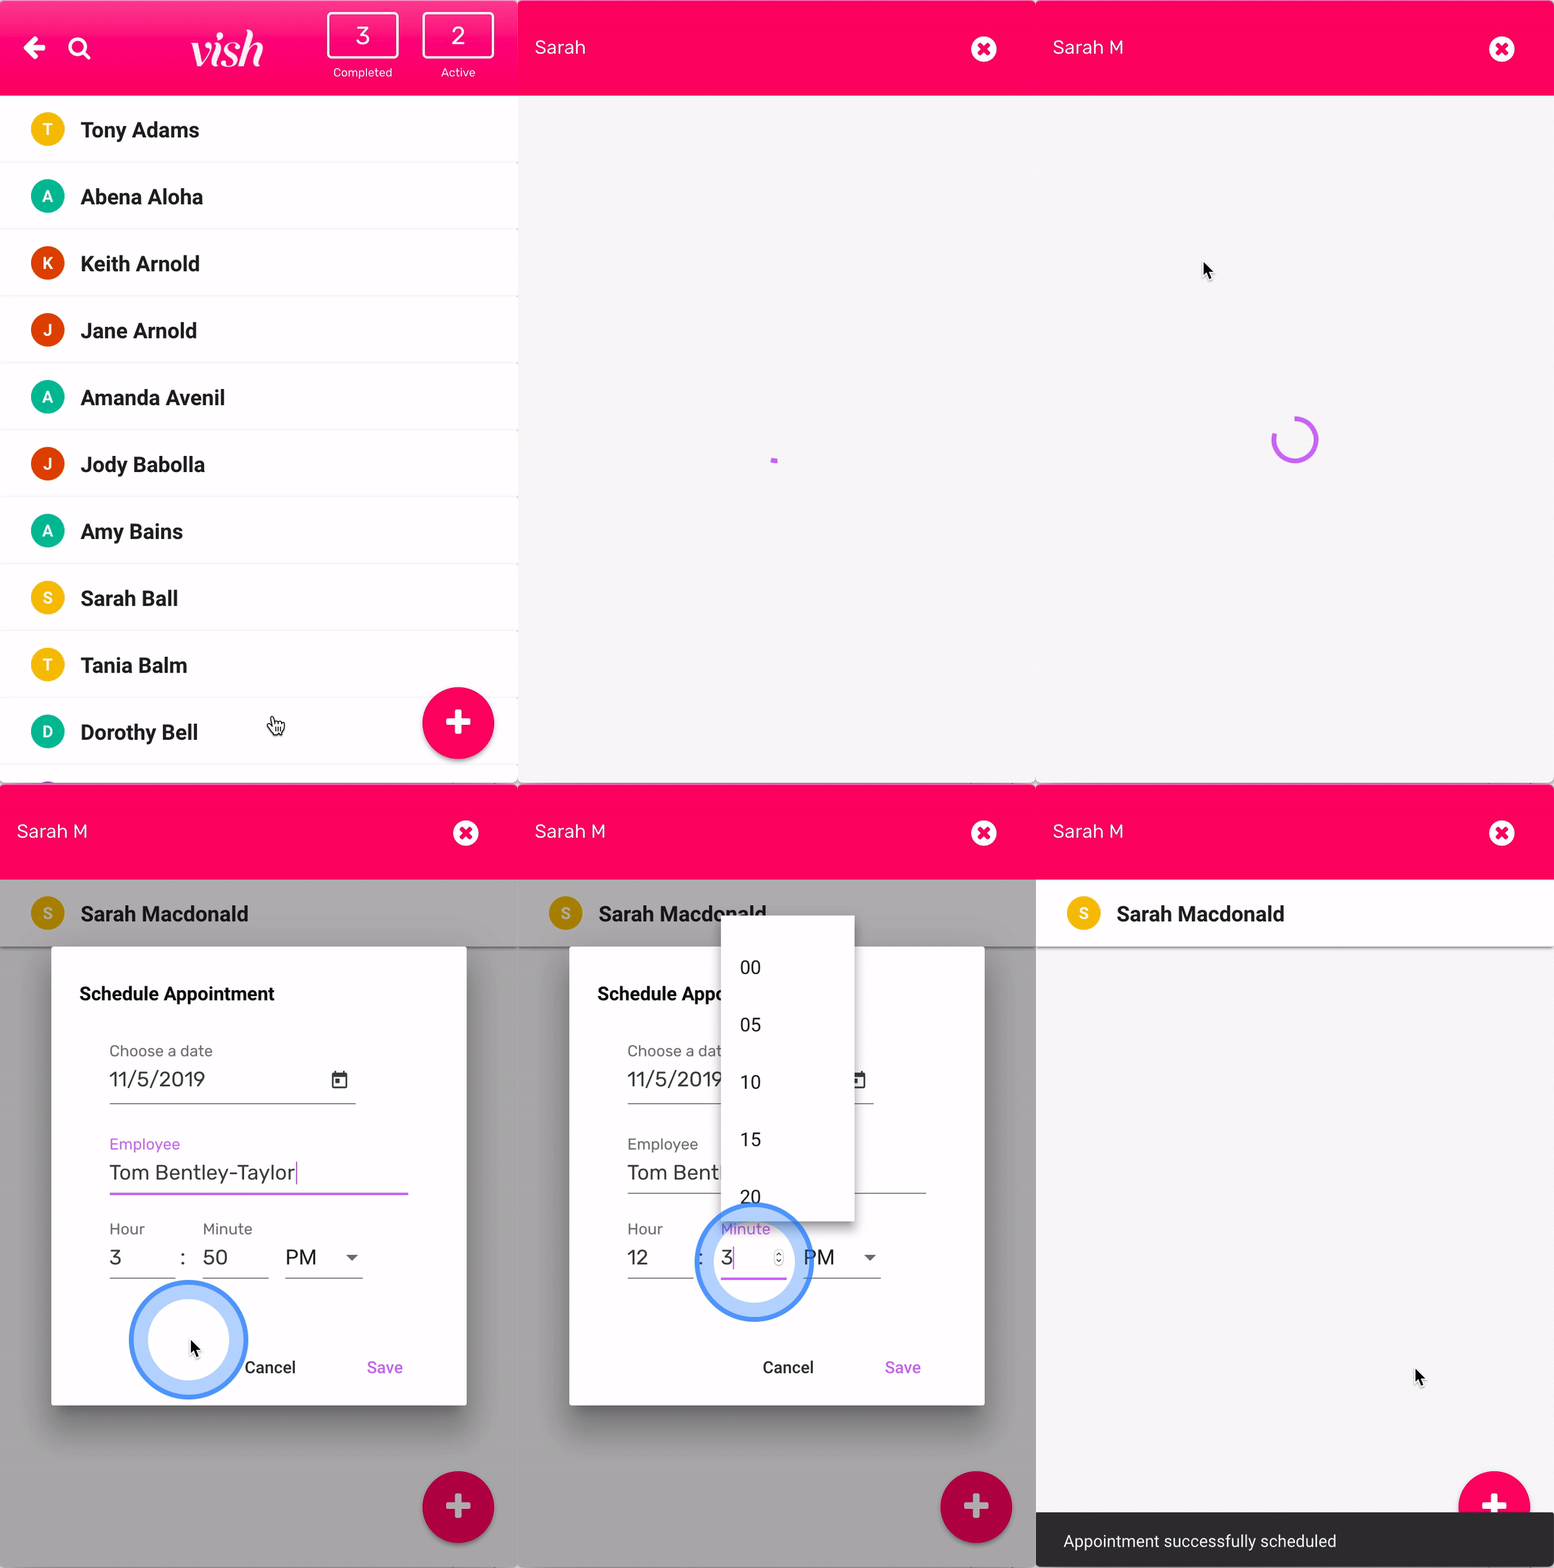
Scheduling an Appointment
- Click Search to expand the search bar
- Start typing in the customer's name
- Select the customer from the list
- Enter the date, time, and employee for the appointment
- Click Save to finish scheduling appointment
